
A great paint job depends more on prep and technique than on the paint itself. With the right roller, a proper primer and the “W” technique while keeping a wet edge, anyone can get an even, mark-free wall. Here’s the step-by-step plus the tricks the pros use so the roller passes don’t show.
What you’ll need
- Quality interior paint (matte hides flaws better; eggshell is more washable).
- The right roller for the wall: short-nap for smooth walls and long-nap for textured or rough surfaces. Wool or microfiber shed less lint; Teflon-coated covers avoid streaks.
- An angled “cutting-in” brush for corners and edges.
- Tray with a grid, painter’s tape and drop cloths.
- Spackle/filler, a putty knife and fine sandpaper (180–220 grit).
- Primer if the wall is new, very porous, stained, or going from dark to light.
Prep (70% of the result)
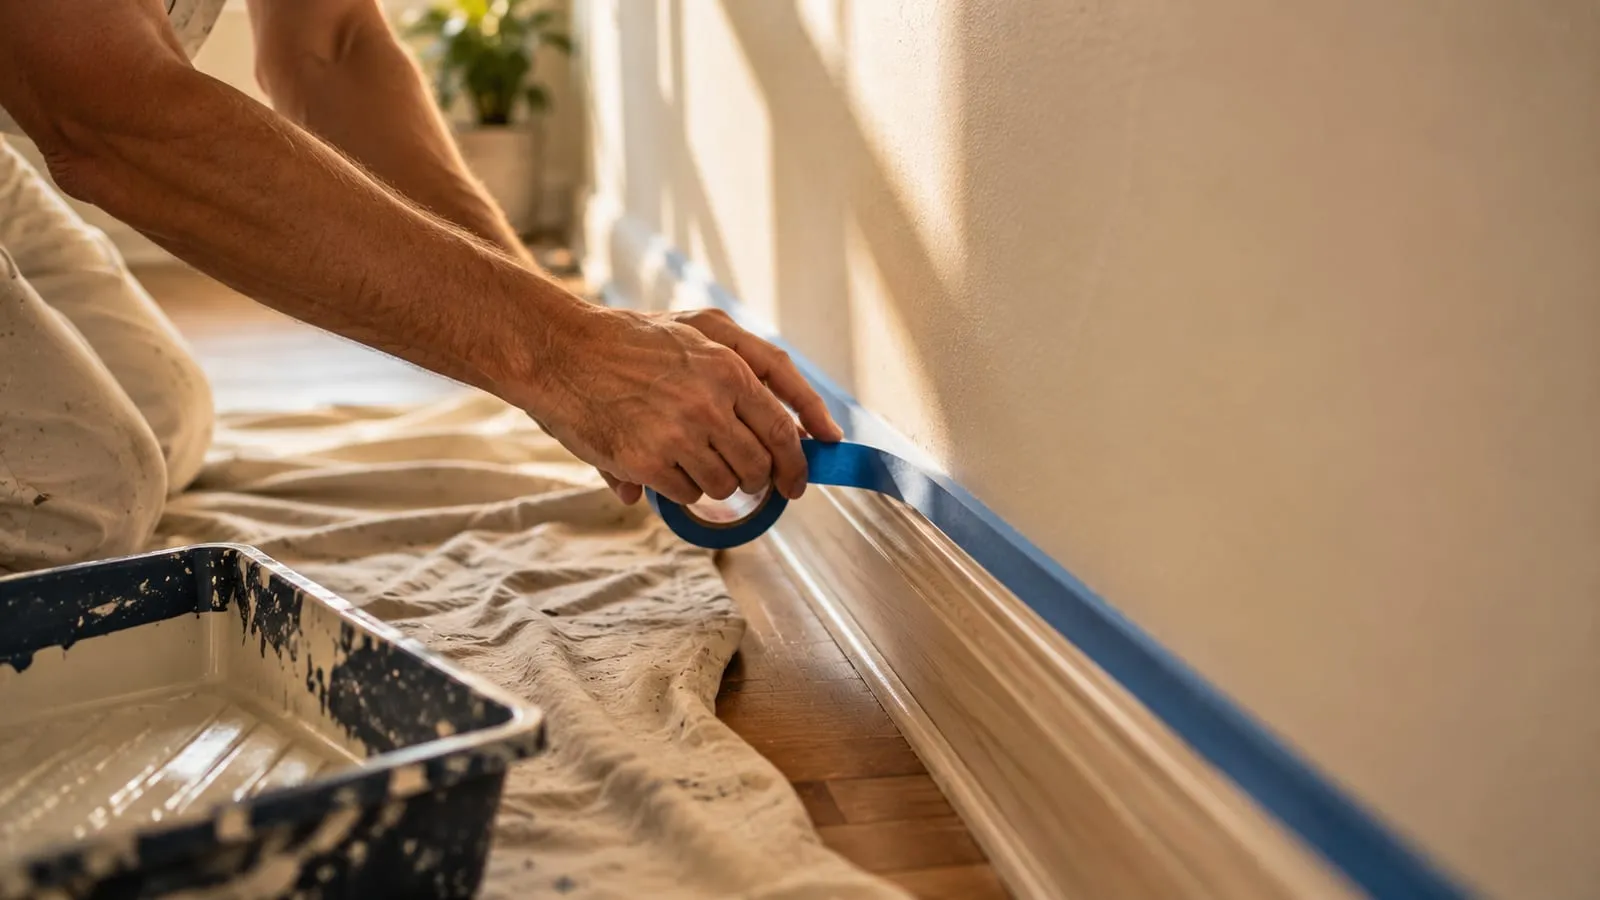
- Protect: cover furniture and floors, and tape off baseboards, trim and switch plates.
- Clean: wipe off dust and grease with a damp cloth and let it dry. Paint won’t grip a dirty wall.
- Patch: fill holes and cracks with spackle, let dry, and sand smooth.
- Prime the patches — or the whole wall if needed: it evens out absorption and prevents flashing.
Cut in the edges
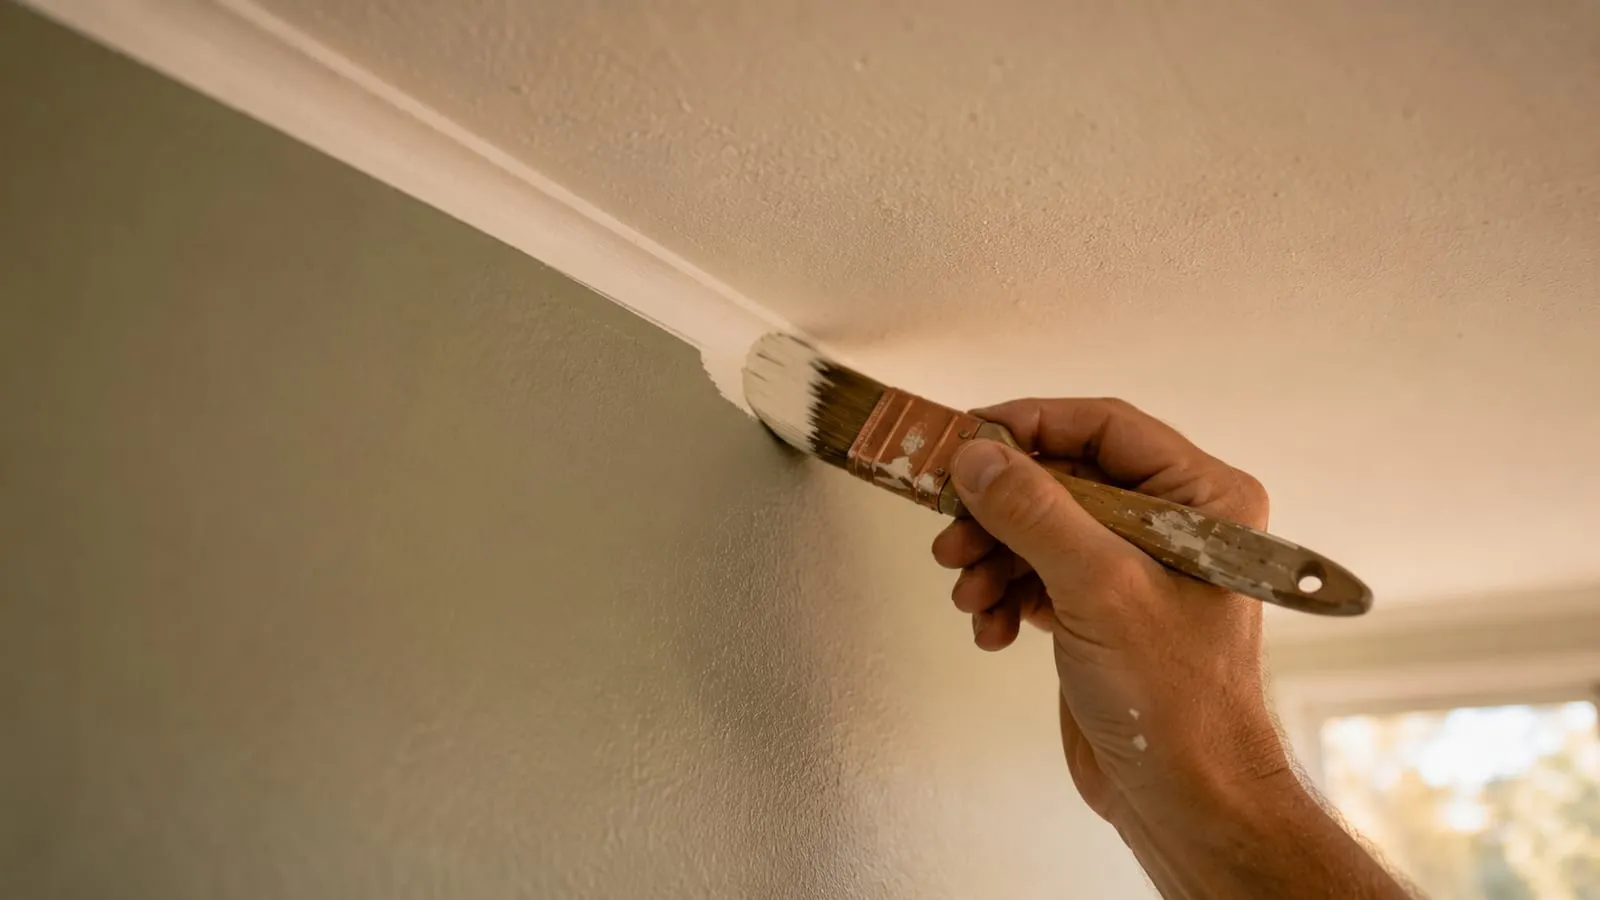
With the brush, first paint a ~2-inch band in the corners, along the ceiling line and around trim and outlets. Key trick: cut in and roll while the brushed paint is still wet; if the cut-in dries first, you’ll see a texture change (the “picture framing” effect).
Roll the wall
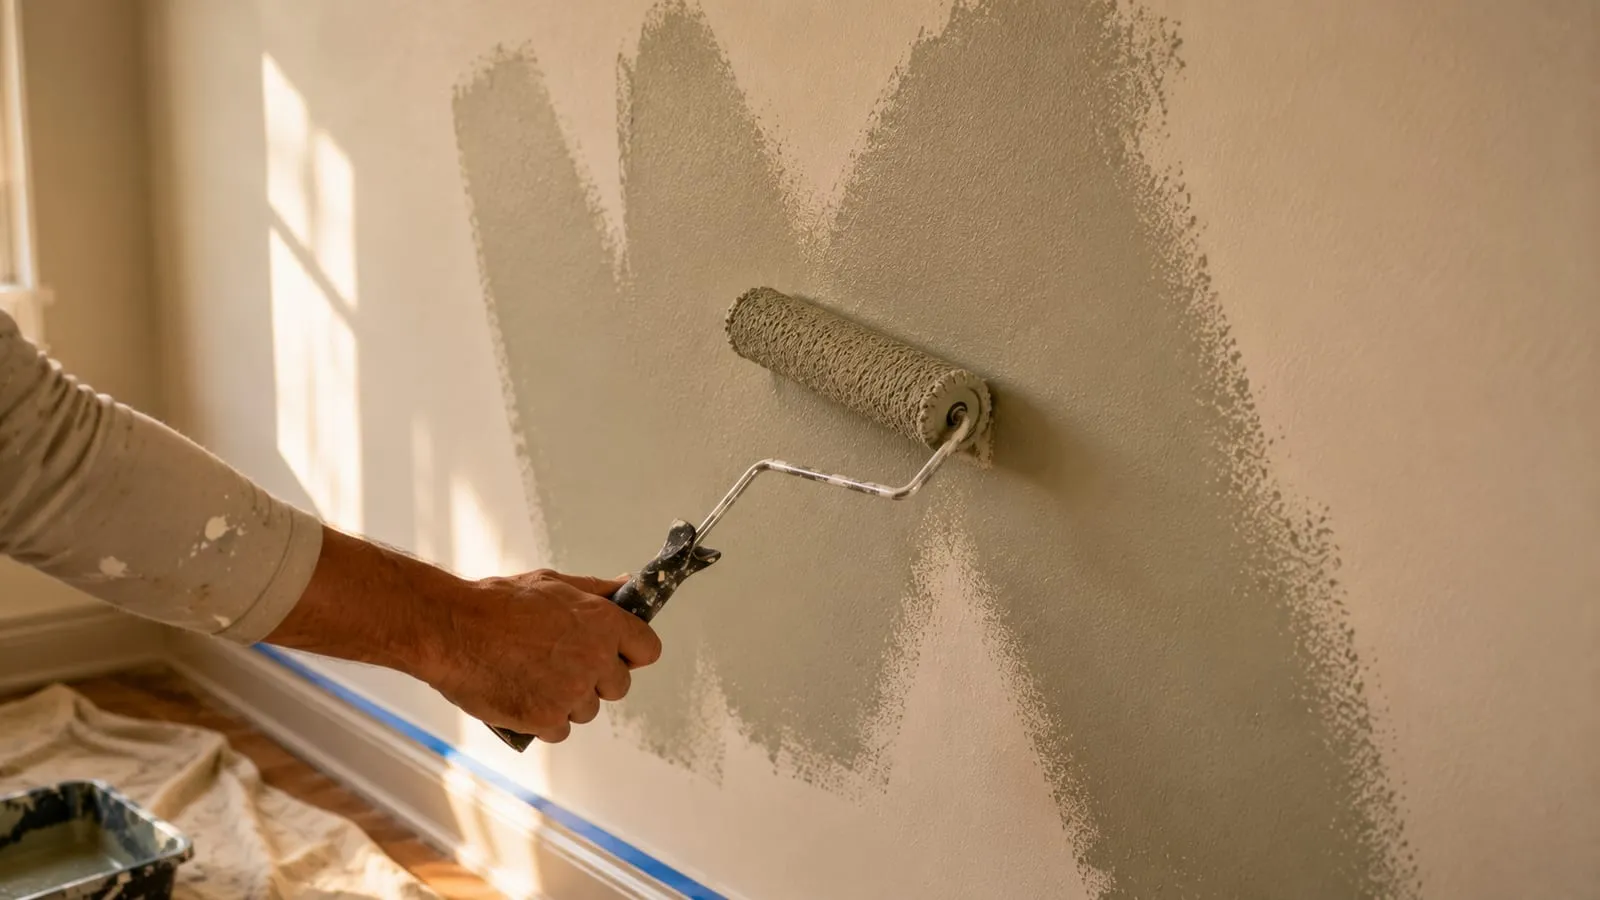
Load the roller and roll off the excess on the grid (neither dripping nor dry). Work in ~1 sq yd sections, laying paint in a “W” or “M” and then filling it in without lifting the roller, always keeping a wet edge (wet-on-wet). Finish each section with a light top-to-bottom pass to “lay off” and unify the texture.
Pro tricks
- Wash a new roller with soap and water and dampen it slightly before you start: it removes factory lint and spreads paint more evenly.
- “Box” your paint: mix all the cans together in one bucket so the color is identical from start to finish.
- Even load: not too much (drips and marks) and not too little (streaks and thin spots).
- Two thin coats beat one thick coat: better coverage and no sagging.
- Keep a wet edge and never go back over paint that’s starting to dry — you’ll drag it and leave marks.
- Use an extension pole: more even pressure and you reach the ceiling without a ladder.
- Check with raking light (a lamp at a low angle) to spot thin areas before they dry.
Common mistakes
- Skipping primer: blotches and uneven absorption.
- Letting the cut-in dry before rolling: “picture framing”.
- Pressing too hard on the roller: leaves ridges at the edges.
- Not letting coats dry: drags the previous layer.
Frequently asked questions
How many coats do I need?
Usually two thin coats. Bold colors or covering a dark shade may need a third.
How do I avoid roller marks?
Right, clean roller; even load; the “W” technique; a wet edge; and a final vertical lay-off pass.
Which roller is best?
Short-nap for smooth walls; long-nap for textured. Wool/microfiber or Teflon for less lint and fewer streaks.
How long does it take to dry?
Touch-dry in 1–2 hours; 4–6 hours between coats; full cure takes several days.
When do I remove the tape?
Before the paint fully dries, pulling at a 45° angle for a crisp edge.